|


What
is the Rodster®?
© Copyright Caroselli.
No images or text located anywhere on this site may be reused
or republished without expressed written permission from Rodster,
Inc., d.b.a.: Caroselli Design. The Rodster Street Rod design
is protected by
U.S. Patent # D450,284.
"Rodster®" is a registered
trademark of Caroselli Design. |

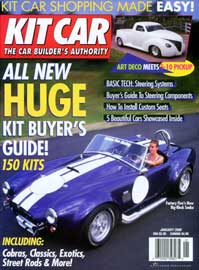
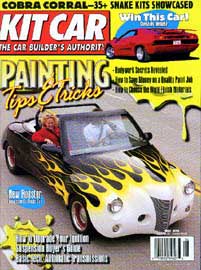
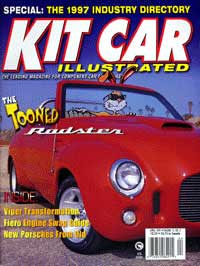
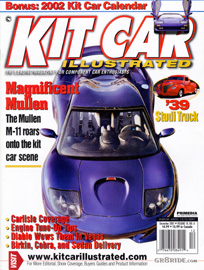
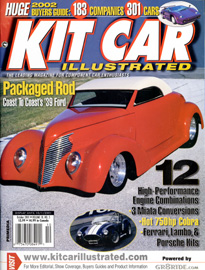
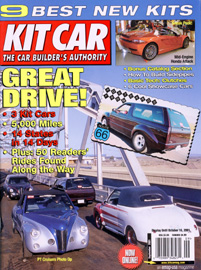
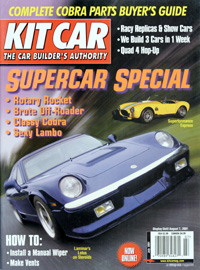
What is Kit Car Magazine saying about the Rodster® Street Rod?
(To see enlarged
versions of the articles and photos of
the buildup process, click on the magazine pages.)
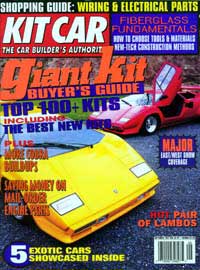
 Kit
Car Magazine
Kit
Car Magazine
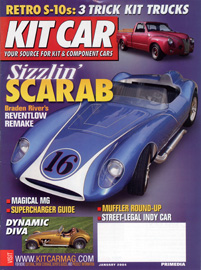
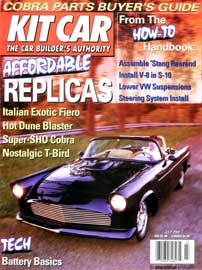
Add Heat To A Blazer
Swapping an LT-1 into an S-10-based Rodster is a big and rewarding
project.
Text and photos by Harold Pace
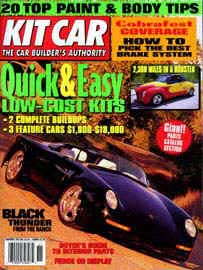
S-10 Blazers and pickup trucks have recently been discovered by the kit car industry as ideal donor cars for kit-rod applications. The Master Street Rod ("Masterpiece," Jan. 2000) and the Rodster ("Highly Flammable," May '99) are both based on this affordable and reasonably modifiable platform. But like the Fiero, a new suit of racy clothes suddenly makes the four-and six-banger mills seem a trifle lackluster. What the S-10 needs is a muscular V-8 transplant, and there are several ways to do this.

Installing a 305-inch or 350-inch Chevy is a tried-and-true swap that has been accomplished many times. There are even several books on the subject published by JTR Publishing, including Chevrolet S-10 Truck V-8 Conversion Manual and Chevrolet TPI and TBI Engine Swapping. Motor mounts and other parts for this swap are sold by Stealth Conversions.
However, as nice as the regular Mouse motors are, the King of the late-model Mice is the LT-1. This 285-310hp powerhouse is the hottest of the pushrod Chevys that can pass even the tough California smog checks. How much harder can it be to install than any other Chevy? To find out, we visited Scott Ponton at Advanced Automotive Resources in Dallas, Texas. His customer Ernie Colaizzi had recently purchased the Santini-flamed Rodster that we featured on the cover of our May '99 issue. He was sold on the fantastic looks, but the anemic four-cylinder puffer had to go. Colaizzi is a musclecar type of guy with a stable of hot cars, and he wanted his first kit car to have to punch to back up the great looks.
Colaizzi knew Ponton was the man for the job, as he had previously swapped three other LT-1s into unsuspecting S-10s. First, they established some ground rules.
Colaizzi wanted a daily driver, not a show queen. This left out billet valve covers, super detailing, and modifications that detracted from practicality. In Texas, this also meant air conditioning and power accessories that really work. And although Ponton had performed similar swaps before, both parties realized that every swap is different and potentially an expensive enterprise, particularly in the age of electronic engine management systems. Ponton estimates a similar job would run about $6,000 in labor alone (100-120) hours) plus about $3,000 for the engine and tranny, and roughly $1,500 in miscellaneous parts.
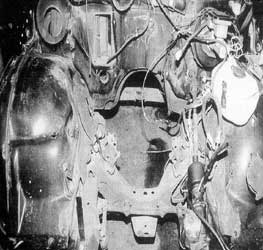
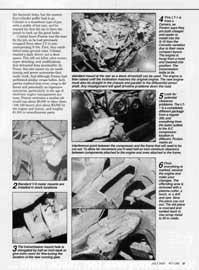
1. Ponton starts by removing everything he doesn't need from the Rodster. This includes the running gear, exhaust system, cooling system, and the wiring harness from the firewall forward. Although parts of the wiring will be used later, removing them now prevents crushing or damaging them as the new mill is slipped in place. Prior to removing the original engine, Ponton says it is mandatory to measure the transmission inclination by placing an angle gauge on the output shaft. Matching this angle with the new engine is critical.
2. Standard V-6 motor mounts are installed in stock locations.
3. The transmission mount hole is elongated by half an inch back to give extra room for fine-tuning the location of the new running gear.
4. This LT-1 is from a Camaro, as Ponton says they are both cheaper and easier to install into the S-10 than the Corvette variation due to their more compact layout. The engine is hung from a hoist and lowered into position. The transmission bolts to its standard mount at the rear so a stock driveshaft can be used. The engine is then raised until the inclination matches the original engine. The new engine must also be straight in the chassis and parallel to the differential pinion shaft. Any misalignment will spell driveline problems down the road.
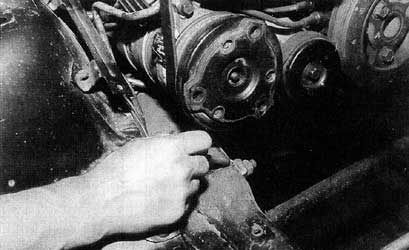
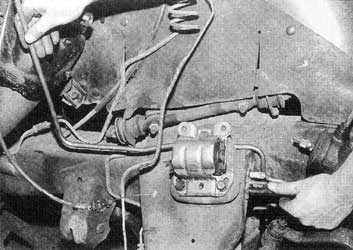
5. Look for potential clearance problems. The LT-1 is a completely different package from a regular 350, and everything from the water outlets to the A/C compressor location is different. Ponton marks an interference point between the compressor and the frame that will need to be cut out. To allow for movement you'll need half an inch minimum clearance between components attached to the engine and ones attached to the frame.

6. Once everything is marked, remove the engine and make your changes. The offending area is removed with a plasma cutter, a torch, or a drill and saw. Save the piece you cut out. The old piece is reversed and welded back in. Use scrap metal to fill in voids.
7. New fuel lines must be bent to match the S-10 outlets on the frame to the LT-1 fuel-intake lines. This is a lot easier to do with the engine out of the car.
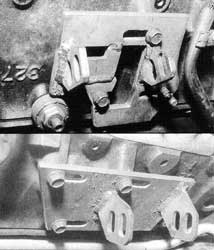
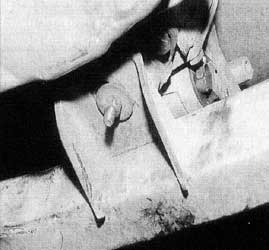
8. The LT-1 is just different enough from a regular 350 TPI or TBI to render Stealth motor mounts unusable in stock form. Ponto fabricates his own from 5/16-inch-thick steel or modifies the Stealth ones after carefully blocking the engine into its final position. Here you can see where the ears on the Stealth mounts have been shortened and rewelded. Also note cutout on the mount to clear the sending unit. Mounts bolt to stock isolators -- don't even think about mounting the engine solid. Use wood or metal wedges to dummy the engine into final position, then make mounts and weld them up. Bolt mounts into place and double-check the centering and inclination.
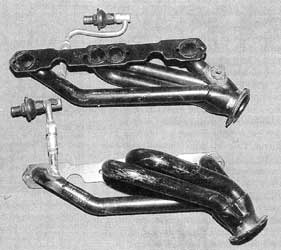
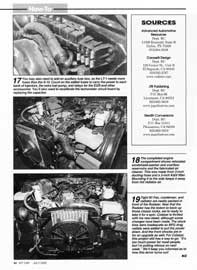
9. Ponton recommends Hedman headers made for the S-10/LT-1 swap (PN 69520). These will wind around the steering column and exit under the car. Check your headers and manifolds carefully for smooth sealing surfaces before installation. Here, LT-1 air-pump tubes have been welded to the headers before installation.
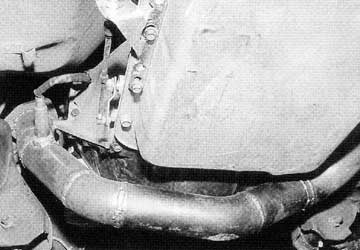
10. An exhaust crossover tube is fabricated from 2 1/2 inch-diameter tubing which opens up to 3 inches and feeds back to the high-flow cat and Flowmaster muffler with stainless steel tip. Make sure the exhaust system is at least half an inch from all metal surfaces, with hoses and lines routed even farther away or protected from heat by shields. Stock exhaust hangers are used.
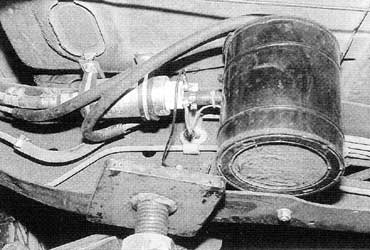
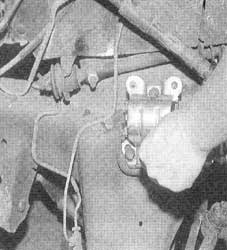
11. While still underneath we see where Ponton added an ACCEL (street model) electric fuel pump to the bottom of the car. It's spliced in where the factory had installed a rubber isolation fitting, and the main fuel line must be shortened and reflared. The carbon canister has been mounted next to it; this is normally located under the hood, but we need all the room in there we can get!
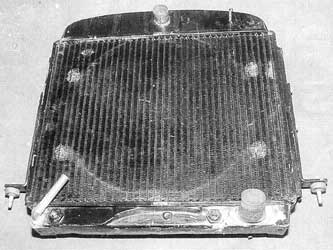
12. The standard radiator is used, but must also be modified. Note the extra nipple added to the bottom for the LT-1 oil cooler. Another nipple is added on top for the LT-1 reverse-cooling system. This is plumbed to an outlet on the throttle body. The bottom radiator hose outlet has a 135-degree fitting brazed on for clearance and to aim at the relocated hose.
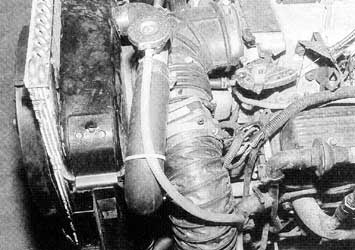
13. The Rodster already has a remote filler for the radiator, and this is angled to the side. The air-filter system must be angled as well and relocated. Radiator hoses were pieced together from bends purchased at an auto parts store. Dummy up what you need and take it to the store with you. The standard Rodster pulling-type electric fan was retained but moved over to gain clearance for the air pump.
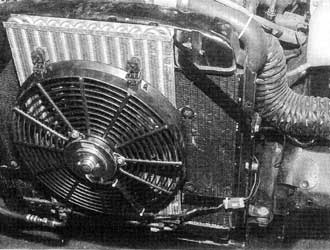
14. A Perma-Cool slimline pusher fan was added to the other side for more cooling. There isn't a way to install an engine-driven fan on the LT-1. The air-conditioning system requires a lot of work. A 19x12-inch dual-pass condenser was custom-built by a radiator shop and attached with fabricated brackets. Custom hoses were made up by North Texas Hose. Mock up your hoses with old fittings and hose for trial fitting.

15. The A/C compressor manifold is off the Camaro, but must be modified for clearance on the Rodster. The suction-side line is cut flush off the back of the body, capped, and welded shut. Cut the suction-side line off the S-10 system close to the fitting. Drill a 5/8-inch hole in the top side of the Camaro manifold and weld the S-10 line in place. Make sure the line clears the exhaust system. The power steering must be worked on as well (we warned you that swaps are not simple). The metal tube on the Camaro pump must be bent to clear the steering and headers, with new lines made up to connect the pump to the steering. Be sure to have this done by a professional -- line pressures are 1,000 to 3,000 psi, and leaks can be deadly.
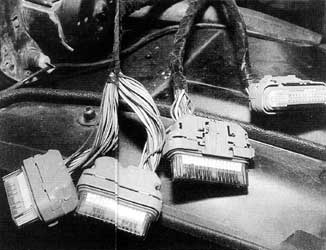
16. Combining electrical systems makes the rest of the swap look easy. Ponton says to start with the factory harnesses for the LT-1 and the S-10, and buy the factory manuals, not aftermarket versions. Study the wiring diagrams thoroughly. Then lay the LT-1 harness in the engine compartment and use an ohmmeter to track each wire until you know what they all do. Reconnect the appropriate wires to their counterpart in the S-10 system. Then identify the systems supported by the LT-1 PCM electrical system that you won't be using on your kit. For instance, your S-10 may not have ABS or traction control. Find the wiring and sensors that control these features and either ground or isolate them, depending on their function. Unfortunately, the way this is done varies with the model of your S-10 and LT-1 engine, so we can only offer some guidelines. If electrical systems are not your strong suit you may want to bring in an expert for this phase or be prepared to spend a lot of time learning and experimenting. Here we see the PCM where it has been mounted on the inner fender panel.
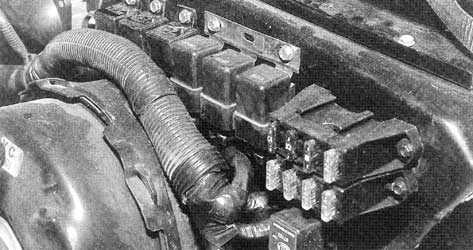
17. You may also need to add an auxiliary fuse box, as the LT-1 needs more fuses than the S-10. Count on the added fuses to carry the power to each bank of injectors, the extra fuel pump, and relays for the EGR and other accessories. You'll also need to recalibrate the tachometer circuit board by replacing the capacitor.
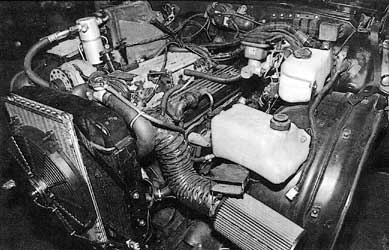
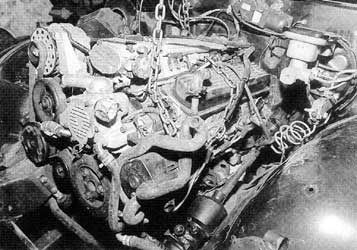
18. The completed engine compartment shows relocated windshield-washer and overflow reservoirs and the fabricated air cleaner. This was made from 3-inch ducting hose and a 3-inch K&N filter. Mounting it to the side keeps it away from hot radiator air.
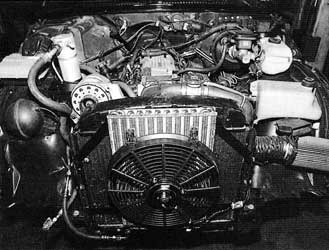
19. Tight fit! Fan, condenser, and radiator are neatly packed in front of the Rodster. Now that the Rodster has the brawn to back up those classic looks, we're ready to take it for a spin. Colaizzi is thrilled with his new steed, although some changes have been made. The stock tires were inadequate so BFG drag radials were added to put the power down. And the front shocks are in for an update as well. For Colaizzi, this project still has a way to go: "It's too much power for most people, but I'm putting nitrous on next week." We'll keep you informed as to how this terror turns out!
Sources:
Advanced
Automotive Resources
Dept. KC
11309 Emerald, Suite B
Dallas, TX 75229
972/484-8238
Caroselli
Design
Dept. KC
128 Center St., Unit B
El Segundo, CA 90245
310/322-2767
www.rodster.com
JTR Publishing
Dept. KC
P.O. Box 66
Livermore, CA 94551
925/462-3619
www.jagsthatrun.com
Stealth Conversions
Dept. KC
P.O. Box 11411
Pleasanton, CA 94588
925/462-3619
www.jagsthatrun.com