|

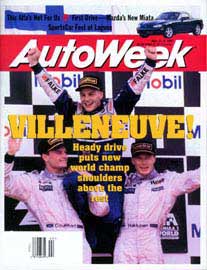


What
is the Rodster®?
© Copyright Caroselli.
No images or text located anywhere on this site may be reused
or republished without expressed written permission from Rodster,
Inc., d.b.a.: Caroselli Design. The Rodster Street Rod design
is protected by
U.S. Patent # D450,284.
"Rodster®" is a registered
trademark of Caroselli Design. |

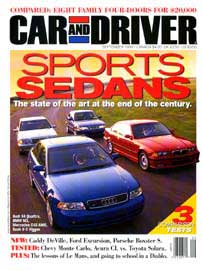
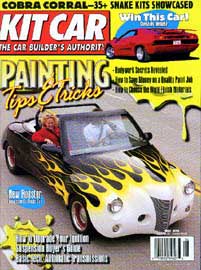
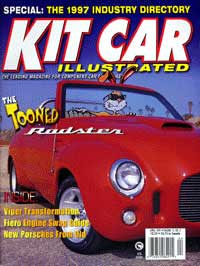
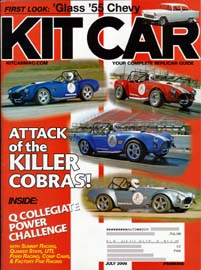
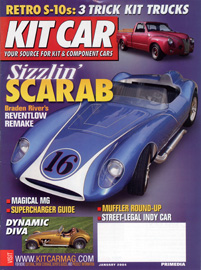
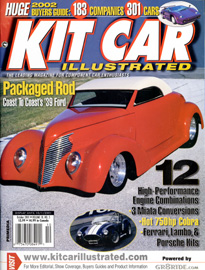
What is Kit Car Magazine saying about the Rodster® Street Rod?
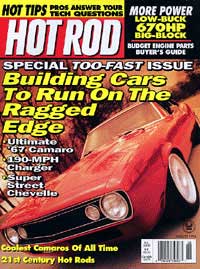
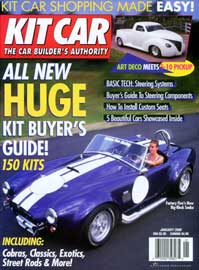 HOT
ROD HIGH
HOT
ROD HIGH
Why Not Build a Rod That Can Go Anywhere?
By Dan Burrill
Photography by Dan Burrill
As regular readers of this magazine know, Henry Caroselli set the kit car industry on its ear several years ago, with the introduction of the S10-based Rodster. Instead of making an old car look new, he reverse-engineered a newer daily driver that looked old. Great idea for most, but driving a lowered, two-wheel-drive hot rod every day can be problematic for some.
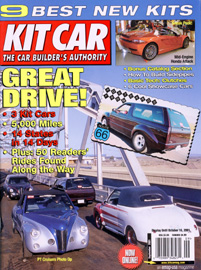
Kraig Short is an engineer who just happens to live in the Pacific Northwest where people have been known to rust before they tan. Kraig was in the market for a four-wheel-drive, go anywhere rig when he spotted an ad for the Rodster. Being a big fan of Henry's designs, and having a desire to build a one-of-a-kind car that would fit his lifestyle, he ordered the builder's information packet.
Then Kraig figured out what would be needed to build the only 4x4 Rodster kit car in existence. Kraig, by his own admission, is a builder. In addition to several small projects, he built a '29 Mercedes replica. But he had no idea how easy or difficult it would be to convert an S10 donor vehicle to a Rodster 4x4.

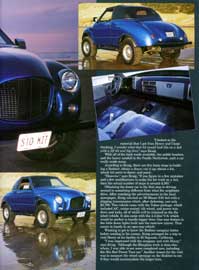
I looked at the material that I got from Henry and I kept thinking. "I wonder what that kit would look like on a 4x4 with a lift kit and big tires," says Kraig.
With all of the back roads available, the public beaches, and the heavy rainfall in the Pacific Northwest, such a car really made sense.
According to Kraig, there are five basic steps to building a Rodster: obtain a donor, cut it up; obtain a kit; attach kit parts to donor; and paint.
"However," says Kraig, "If you figure in a few mistakes and a few modifications to make the kit work on a 4x4, then the actual number of steps in around 4,383."
Obtaining the donor car is the first step to driving around in something different from what the neighbors drive. After watching the advertisements in the local newspaper, Kraig selected an '89 Blazer S10 4x4 with a slipping transmission which, after dickering cost only $2,700. This vehicle came with the Tahoe package, which included A/C, cruise control, tilt wheel, and power windows and locks, all of which will be retained on the finished vehicle. It also came with the 4.3-liter V-6, which would be perfect to handle bigger tires. One nice feature is the little dome lights built into the rearview mirror. That comes in handy in an open-top vehicle.
Wanting to get to know the Rodster company better before sending in his money, Kraig arranged for a trip to visit Henry at his facility in El Segundo, California.
"I was impressed with the company and with Henry," says Kraig. "Although the fiberglass work is done elsewhere, I was able to see some completed cars, including the Hot Rod Power Tour Car. "Another reason for the visit was to measure the wheel openings on the Rodster to see if they would accommodate the larger tires.
Now it was time to get the donor ready for the kit. Cutting up the vehicle is the fun part. Follow the instructions carefully. If you have questions about the exact location of a cut, wait until the kit arrives. While the front end was off and the engine easy to access, the new spark plug wires, fuel filter, K&N filter, and other parts were installed. "Next I installed the 3-inch lifts, which were not as hard as I thought they would be," says Kraig. "Then Rancho shocks were installed. Since the Blazer had the collapsible steering column, there was no major modification for the 4x4 floor-mounted shifter. At this point I dropped out the leaking and slipping transmission and had it rebuilt."
Wanting to see the kit car show at Knott's Berry Farm, Kraig arranged to pick up his Rodster kit at that time. Not wanting to pay the crating and shipping charges, Kraig borrowed a minivan with a flatbed trailer and drove 1,000 miles down the freeway to the show.
The kit was ready, and Henry Caroselli helped secure the larger pieces to the flatbed trailer. The rest of the pieces filled up the back of the minivan. During the night on the return trip, Kraig pulled into a rest stop to sleep. This had been no problem on the way down, because the rear seat folded down into a bed. Now the back of the van was full of kit car parts, so much so that the front seats wouldn't even recline! Talk about a long night.
"After I arrived home, I couldn't wait to start attaching parts," says Kraig. "The assembly manual was clear and detailed with photos and templates."
Modifying the Blazer front fenders and attaching the rear quarter-panels were the most time consuming. The front of the frame had to be trimmed. The front tilt nose section mounts on a bar that's attached between the front framerails. Before installing the nose, it was necessary to relocate the charcoal canister, radiator overflow bottle, cruise control, windshield washer, 4x4 vacuum actuator, and the remote oil filter. The radiator, oil cooler, transmission cooler, and A/C fit between the front of the engine and the nose. This proved to be an excellent kit that went together with a minimum amount of difficulty. The main thing is that, with a 3-inch body lift, the Rodster body doesn't mount to the frame in the same location. Also, if bumpers are to be added, the frame is trimmed a little differently from what is shown in the manual.
The lift-off Carson top is welcome in the not-so-sunny climates. It seals well and is easy to get on and off. At $595, it's one of the more reasonable tops on the market.
From the time Kraig brought his kit home until he was driving a painted Rodster was only two months. The final cost was around $12,000. Not bad for a 4x4 with all of the creature comforts -- a vintage-looking hot rod that can go virtually anywhere.
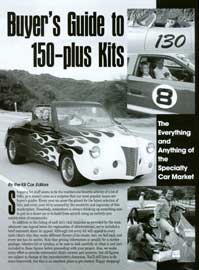
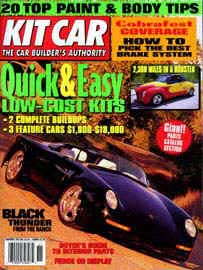
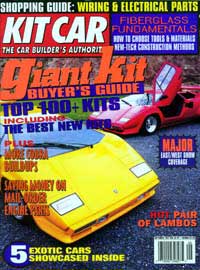
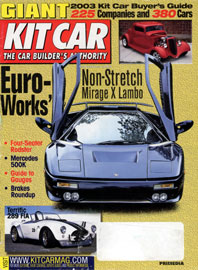
Buyer's
Guide to 150-plus Kits
The Everything and Anything of the Specialty Car Market
By the Kit Car Editors
Shopping for stuff seems to be the number-one favorite activity of a lot of folks, so it doesn't come as a surprise that our most popular issues are buyer's guides. Every year we scour the planet for the latest selection of kits, and every year we're amazed by the creativity and ingenuity of this marketplace. Somebody, somewhere is always thinking up something new to put on a donor car or to build for scratch using an entirely new combination of components.
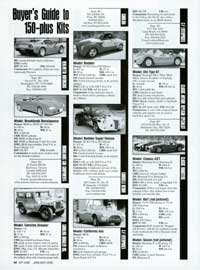
In addition to the listing of each kit's vital statistics as provided by the manufacturer (see legend below for explanation of abbreviations), we've included a brief comment about its appeal. Although not every kit will appeal to every taste (that's why they make different flavors of ice cream, too), we feel each and every one has its merits. Note that pricing information is usually for a starter package, whether kit or turnkey, so be sure to look carefully at what is and isn't included those figures before proceeding with your project. Also, we make every effort to provide information that's current and accurate, but all figures are subject to change at the manufacturer's discretion. You'll still have to do some homework, but this is an excellent place to get started. Happy shopping!
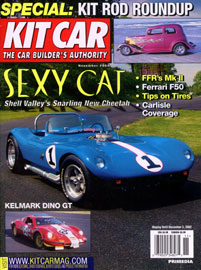
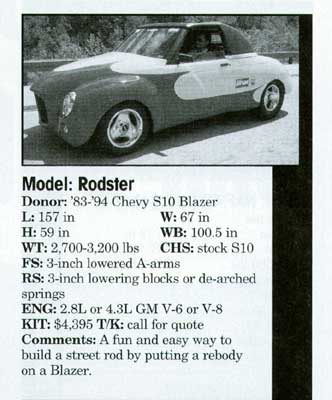 Donor:
'83-94 Chevy S10 Blazer
Donor:
'83-94 Chevy S10 Blazer
L: 157 in.
W: 67 in.
H: 59 in.
WB: 100.5 in.
WT: 2,700-3,200 lbs.
CHS: stock S10
FS: 3-inch lowered A-arms
RS: 3-inch lowering blocks or de-arched springs
ENG: 2.8L or 4.3L GM V-6 or V-8
KIT $4,395 T/K: call for quote
Comments: A fun and easy way to build a street rod by putting a rebody on a Blazer.
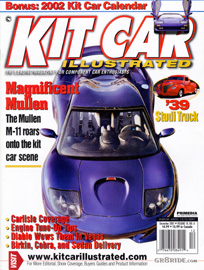
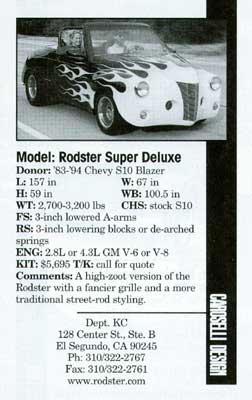 Donor:
'83-94 Chevy S10 Blazer
Donor:
'83-94 Chevy S10 Blazer
L: 157 in.
W: 67 in.
H: 59 in.
WB: 100.5 in.
WT: 2,700-3,200 lbs.
CHS: stock S10
FS: 3-inch lowered A-arms
RS: 3-inch lowering blocks or de-arched springs
ENG: 2.8L or 4.3L GM V-6 or V-8
KIT: $5,695 T/K: call for quote
Comments: A high-zoot version of the Rodster with a fancier grille and a more traditional street-rod styling.
SOURCE
Caroselli Design
Dept. KC
128 Center Street, Suite B
El Segundo, California 90245
310-322-2767
www.rodster.com